Hello everyone!
The holidays are fast approaching. Are you ready? I hope this week cards help you in some way get ready for all of your card making frenzy that is about to happen if it hasn’t already. I know for me that I have been making cards for the holiday for some time now and you have seen a lot of them right here. Well just like you I am not quit done with them yet but am working towards that light at the end of the tunnel.
I purchased the limited edition card kit from Simon Says Stamp for 2014 and am totally in love with it. It’s theme is candy and peppermint. So very cute. Well here is the first card that I made with this kit.
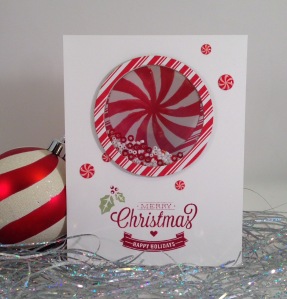
It is a cute see through candy inspired card.
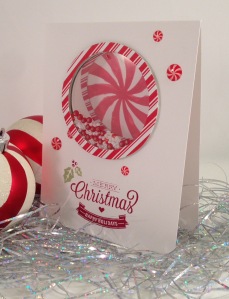
Card base was cut into a standard A2 top folding card
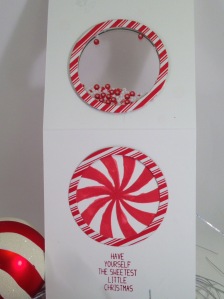
I started with the inside of the card because I used embossing paste with the cute candy stencil that came in the kit. To color the embossing paste I smooshed the red ink pad onto a nonstick mat and added the embossing paste to it. I mixed and added more color until the color was right. I then set the stencil on the card base and carefully spread the embossing paste onto the stencil in an even coat. Then went right away to wash the tool and stencil because the paste drys fast and is very hard to remove after it drys.
When the paste was dry I cut the circle into the front of the card, being sure to line the circle up with the circle on the inside. I also die cut two circle frames. One for the outside and one for the inside of the card. I die cut two pieces of acetate for my windows. I then adhered the acetate to the circle frames with tape runner.
To make the shaker I cut several pieces of foam tape and added them all the way around both of the circle frames making sure not to leave any gaps in the foam that my shaker pieces would fall through. I took the backing papers off of one of the circle frames and adhered it the card base around to circle hole that I cut out. I turned the card over and added my shaker pieces onto the acetate and adhered the other circle frame on top on the shaker pieces lining up with the circle hole. And the shaker it finished.
To finish the card I stamped the sentiment on the front and on the inside of the card and added the enamel dots to the front of the card.
This card was a lot of fun to make and I think will be enjoyed by the recipient.
Here are the goodies that were used to make this card and they are clickable links:
I will be back on Wednesday this week due to the Thanksgiving holiday
See ya soon!
Holly~